Airtex Aircraft Interior - I highly recommend ordering a sample card from the vendors ahead of time. The card contains samples of vinyl, cloth, leather, and carpet in different colors and textures for you to choose. If leather or vinyl is too cold for you in the winter or too hot and sticky in the summer, you may want to install a cloth interior.
Cloth will breathe nicely, but it is hard to beat the feel, durability, and beauty of a leather interior. Vendors will gladly assist you with the design, and are very open about what works and what to avoid.
Airtex Aircraft Interior

Ultimately, the design of your interior including colors, patterns, and materials is entirely up to you. There are numerous vendors that supply interior kits including COO partner Aviation Creations and Airtex, which is the best-known provider.
Option – Purchase A Diy Interior Kit
Before choosing a vendor, read reviews regarding their products and their support. Also know your airplane's configuration ahead of time, as well as your vision of the finished product. Options like headrests, high back seats, rear bench or bucket seats, and map pockets will all come into play when you place your order.
Have your airplane's serial number handy. I can't say I'm looking forward to doing this again. But I am definitely pleased with the results and consider it worth my time and effort. If money is an issue, there is no debate.
I saved about $10,000. The entire job cost me $4500 and about 80 hours of work. For many, this fact alone will tip the balance in favor of an assisted DIY interior. Headliner: Installing the headliner is not exceedingly difficult but can be time-consuming.
It is a good idea to have a helper when installing the headliner. Headliners come in different materials (I prefer wool) and generally attach with contact cement. It's important that the headliner bonds to a clean surface.
Carpets Panels
First, clean off the old glue using acetone or MEK. Be sure to wear personal protective equipment and ventilate the cabin well. Then fit and attach the headliner so it is taut but not drum-tight. Many parts mount through the headliner, and once it's in place, those mounting points will be hidden.
Take pictures and measurements from reference points inside the airplane prior to installing the new headliner, and you'll have an easier time locating the mounting points. If all else fails, use the old headliner as a template to help find mounting points.
We are accepting repair stations, seat upgrades and custom cushion work; however, we are still not doing complete interior upgrades at this time. Access to our facility in Scappoose, OR remains restricted to employees only until the COVID-19 pandemic is under control.
We will be happy to discuss your needs via telephone or email, and we appreciate both your understanding and your business during this global crisis. Tightening screws, making last minute adjustments, and installing the last few accessories such as vinyl-covered door-sills and door latches, has its frustrating moments.
Follow The Rules
However, a project like this is a one-off custom job. By the time I got to this stage, I had learned to expect roadblocks and I knew how to overcome them. The finished product looks terrific, smells better and even feels great because I did it myself.
Details, Details To install the wind lace or welting, remove the overlying thin aluminum strips that hold the welting in place. Hold the new welting in place and poke starter holes through the mounting flaps for the screws.
Then replace the aluminum strip and continue; once the first couple of screws are in place, its easy to complete the job, using the drilled holes in the strip to find the screw holes. I enjoyed the solitude of working and the mastery of new tools and techniques.
However, my absence sorely tried the patience of my wife and my office staff, so there is a tradeoff. If you decide to replace your own interior, start with the attitude that you will be undertaking a big project with a finite and worthwhile goal.
Option – Do It Yourself From Scratch
If you have never done anything like this before or if you are relatively inexperienced with tools, there will be frustrations. Take them in stride; I promise you'll be proud of the results. Misc.: While the side panels and headliner are removed is a great time to perform wiring upgrades, install insulation or sound deadener, or remove and buff (or replace) windows, but those topics can all be covered in separate articles.
From Airtex, I ordered welting, door gaskets and bags of interior screws and washers. They have everything you need and they know what you need. I ordered enough high-grade gray leather, cloth and foam to cover all six seats and armrests and had it shipped directly to Daves Auto Upholstery in Watertown, Connecticut.
Do It Again? This is a tough question because Ill probably never face the possibility again. Renovating an airplane interior is in the same league as painting an entire airplane or rebuilding an engine. Most pilot-owners will face these complicated and expensive tasks only occasionally, if at all.
Although the seats appear to be the most difficult task, the headliner is actually more daunting, says Stretch, or so it would appear. The reality is that even amateurs can tackle the headliner if they take their time and approach the task logically.
Stretch says AirTex will stay on the phone with a customer for as long as it takes to get the job completed. An awl or large pins-I used the stickers from the Thanksgiving turkey-to flag screw holes and other locations before cutting will help.
Expect to spend a lot of time on this step, trimming, re-cutting and worrying things along. The moldings can be painted instead of covered, but the cloth adds quiet and warmth and lends a softer, more finished look to the interior.
The extra cost is insignificant. The cloth also adds quite a bit of thickness to the thin moldings, which originally snapped into channels along the upper edge of the windows. If this sounds difficult to piece together, customers apparently don't have much trouble with it.
"We don't send instructions with anything we offer," Stretch told us. "We've always just given support and instructions over the phone. This isn't exactly rocket science. A lot of people really seem to enjoy the process," he adds.
We added several large elasticized pockets on the seatbacks and accessory pockets along the sides of both front seats to hold pencils, navigation plotters, markers and other pilot paraphernalia. The seats would be stripped to bare metal and built up with aircraft foam.
For more than five decades, active and dedicated aircraft owners and pilots have turned to AVIATION CONSUMER to answer their most important buying questions. This website contains many older reviews. Unless otherwise noted, these reviews carry product pricing from the time of the original review.
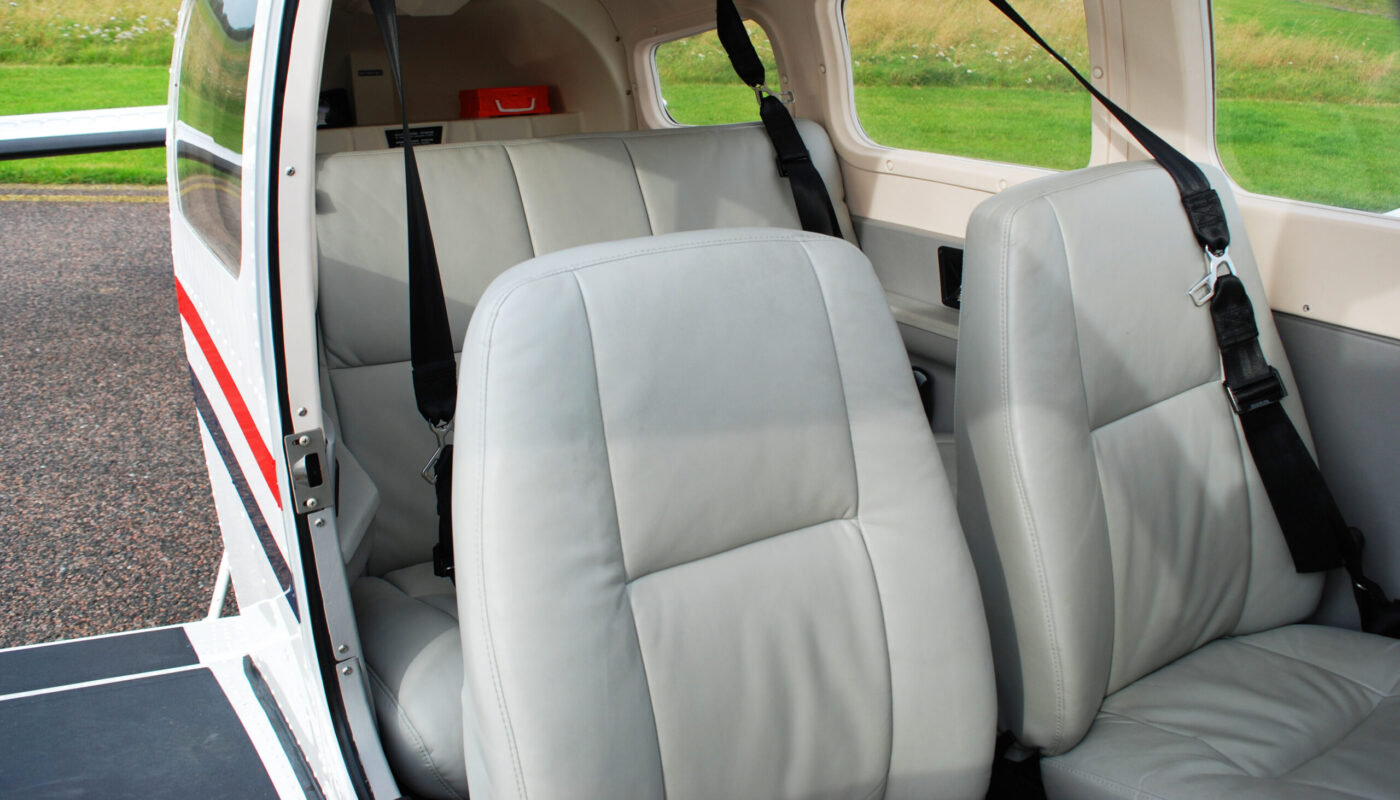
I decided to buy good materials and have my local auto upholstery shop do the rebuilds, something I don't have the skill or time to learn. They had done a fine job of building new cushions for my J-3 Cub and I knew they were reliable and reasonable in cost.
Work Starts I received everything from Airtex, including the covered plastic moldings, within a week. The sidewalls were exactly as advertised, including the custom pockets. I was surprised and satisfied. There were absolutely no hassles or delays.
You and your passengers will appreciate the comfort of the new seats, especially on long trips. Better comfort means less fidgeting and less fatigue. As a pilot, less fatigue means you'll be more focused on your job — flying the plane.
Blue skies! Additional services may be available. Give us a call at 800-888-6910 to discuss any specific needs or requirements for your aircraft. Any custom upgrades fabricated without the aircraft on-site may require customer provided templates.
Contact us for additional information and pricing. In options 1 and 2, you perform the labor, while with 3 and 4, the extent of your labor only involves a few wrist and finger muscles to write a check.
In all fairness, you're going to write a check no matter which option you choose, but the checks for options 3 and 4 will be larger because you'll be paying for the hourly labor in addition to materials.
Speaking of checks, the average cost for a do-it-yourself, four-seat airplane interior is currently somewhere around $6,000-$8,000 depending on options. Larger aircraft will be more expensive, as will an interior outfitted in leather. AirTex's improvement is a stiffer, corrugated polyethylene board that's stronger and waterproof.
AirTex covers this with fabric sandwiched with a thin layer of foam. The board holds the stitching, obviating the need for glue, which eventually deteriorates. Using its library of patterns, AirTex can provide complete carpet sets for most aircraft.

These are usually multiple pieces so they can fit around seat rails, consoles, rudder pedals and ducting. These either glue to the floor or attach with Velcro, so they can be removed for cleaning and maintenance.
Once the frame is ready, cut and glue the webbing to the seat frame, followed by fitting and gluing the cushions to the webbing. Most of the glues used for interiors are contact cements. After applying contact cement, let it dry or "tack up" prior to adhering the pieces together.
You only have one attempt because once the pieces touch, they bond very tightly. Work slowly and follow the instructions on the glue container. Airtex Products, Inc. opened for business in 1949, and is currently in its third generation as a family-owned business, all of whom are pilots.
With two locations, a 12,000 foot manufacturing facility employing approximately 30 people located in Pennsylvania, and an installation and engineering facility located in New Jersey, they have the manufacturing capability to produce interiors on demand for just about every aircraft built on a production line.
Side panels: The new side panels will require cutting openings for air vents, intercom jacks, door handles, fuel tank selector, etc. Fit and measure numerous times before you cut. Remember when I said not to throw away the old interior parts yet?
Here's where they come in handy. Sometimes you will fit, measure, and cut, while in other cases the old side panel makes a perfect template. Dodd Stretch showed us how AirTex builds up its seats. Older aircraft typically had a single piece of molded or cut foam for the back and lower seat.
Some aircraft use simple slings or webbing to support thinner foam pads. Original equipment from the 1970s is heavy on glued vinyl and has minimal stitching. AirTex upholstery, on the other hand, is almost entirely stitched and often with double seams covered by piping that protects the seam against wear and premature unraveling.
AirTex is one of a few dozen vendors in the industry who have been at it seemingly forever. The company traces its history back to 1949, when founder Al Stretch migrated from the famous Irvin Air Chute Company to begin manufacturing pre-sewn fabric wing and fuselage envelopes for the post-war light aircraft industry, which was booming.
By the mid-1950s, as that business gave way to more metal-covered aircraft, Stretch expanded the business to begin manufacturing custom interiors for the do-it-yourself trade, which turned out to be fairly sizeable. Wherever I couldn't place large single pieces of the new foam, I used several smaller pieces and I stuffed in handfuls of the old fiber material to seal various areas, including the unused middle vents.
This stopped drafts and made the rear cabin warmer, something that is important in a turbocharged aircraft at any time of the year. As noted in the chart above, prices of complete kits are typically in the $2500 range, although some aircraft cost more.
AirTex imposes a modest surcharge for the use of customer-supplied materials. Check with the company to get a price quote. Seats set, carpets and side panels can each be purchased a la carte or as an entire set.
Either way, they are likely to be manufactured and shipped separately. The chart above shows some sample prices, mostly for four-seat aircraft. Step one is to select fabrics, which you can do on the Web site or by having AirTex send fabric samples.
If you're picky, we recommend getting the samples. Handling the material gives a better sense of color and texture. AirTex offers a range of fabrics and colors that are a step above the mid-1970s to 1980s OEM materials they are replacing.
Interiors in those days were heavy on vinyl in colors whose exact formulations have been mercifully lost to time. Since we are dealing with certified aircraft, it is important to know the regulations. Before beginning the project, your decision-making process should include ensuring the materials meet FAR specs.
The flammability and burn standards for aircraft and interior components can be found under sections 23.853, 25.853, 27.853, and 29.853 of the FAR. The regulations are similar but differ by the type of aircraft. Products used in the construction of an aircraft interior must comply with the applicable FAR section, and there is an appendix within each FAR containing appropriate burn and flammability requirements.
If you choose to have a shop do your interior project, ensure that their materials comply with regulations and that they provide certifications for your logbooks. Jim "Griff" Griffin is an electronic engineer/IT professional based in the Chicago area.
He has extensive automotive and aircraft experience and is well-versed in engines as well as body work and paint. Jim has been an aircraft owner for 23 years and currently owns a 1978 Piper PA-28-161 Warrior II on which he has performed full restoration including engine replacement, interior, engine controls, windows, etc.
Jim has been president of the Schaumburg Pilot's Association for 16-plus years and is a member of the Pilot's Technical Advisory Committee for the Village of Schaumburg DOT. The substrate is pre-cut for various wall-mounted appurtenances such as vents and armrest bolts.
However, the foam, cloth and vinyl coverings are not pre-cut, which allows the owner/installer to cut out only the desired areas. For example, I don't use the middle vents so I didn't cut those out. Once covered, they could no longer be snapped in, so I just installed the moldings right over the channels.
The cloth also covers up the screw holes in the moldings so the awl is necessary to find the original holes for re-installation.
airtex aircraft interior kits, airtech aircraft interiors, airtex aircraft carpet, airtex interior installation videos, airtex interiors installation, airtex interior kit, airtex interiors carpet, aircraft interior fabric